Minimal Platform Configuration
This section explains the steps to configure the application side of your platform.
1. Import a structure data set
In ODE platform, a structure is typically a school or a grouping of school. The user’s data loading process is designed around this notion of structure, because schools are the "master data" of user’s identity.
-
Connect with the default super user :
tom.mate/password -
Go to URL : http://localhost:8090/directory/wizard (it’s the CSV’s import wizard)
-
Use the test data set located in
path-tospringboard/sample-be1d/EcoleprimaireEmileZolafolder
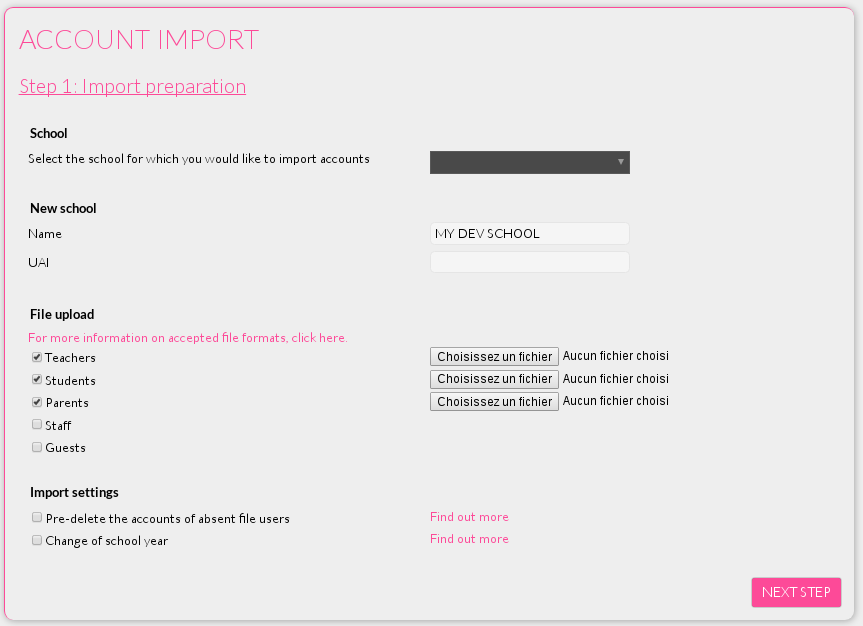
Fill the form as described in the screenshot below
-
Choose a name for your new school
-
Upload files for each user profile :
-
CSVExtraction-eleves.csvfor Students -
CSVExtraction-enseignants.csvfor Teachers -
CSVExtraction-responsables.csvfor Parents
-
-
Click Start import on Step 2 screen
-
Click Finish on Step 3 screen (The following message is displayed : "Your import has been successfully completed")
2. Configure application roles
In ODE platform, each application provides its set of precise permissions. You have to group the permissions into high level roles before granting user access.
-
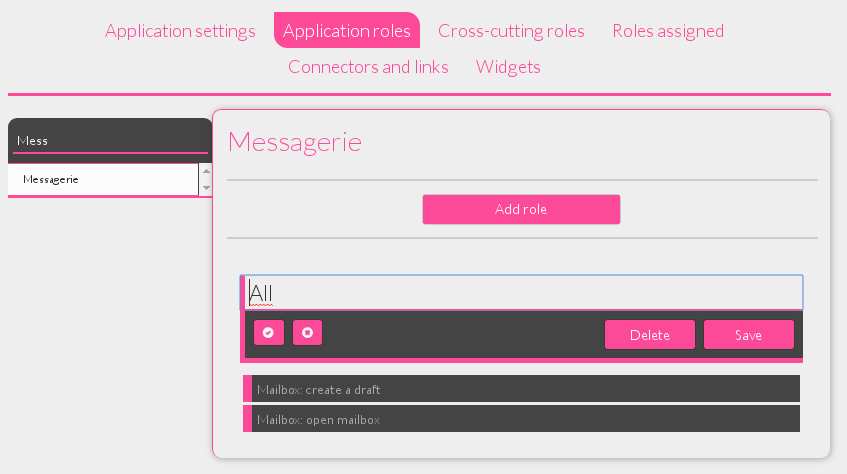
Chose "Application roles" menu
-
Enter "Message" in the left search field and select the application called "Messagerie"
-
Press button Add Role
-
Name your role "All"
-
Select all permissions ("Mailbox: create a draft" and "Mailbox: open mailbox" )
-
Press button "Save"
3. Grant roles to groups
-
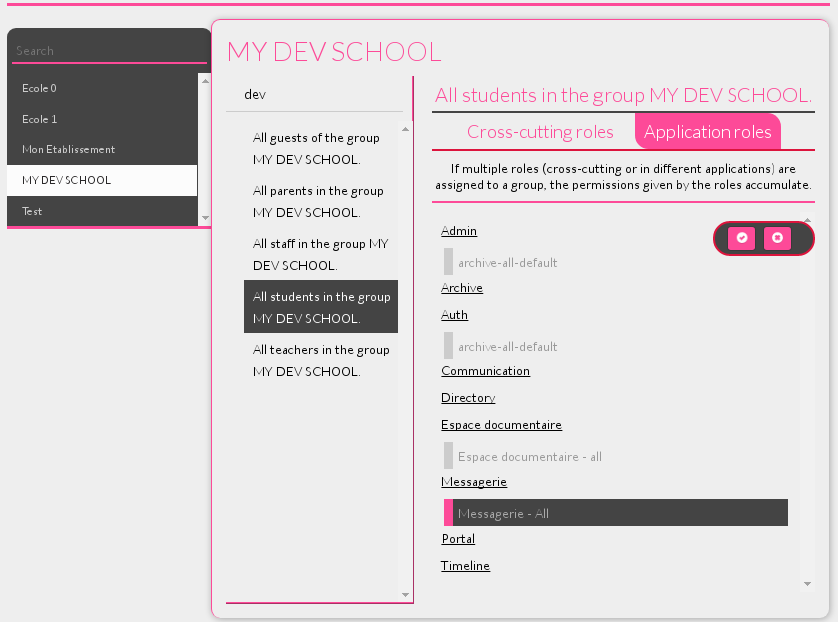
Choose "Roles assigned" menu
-
Select the school called * "MY DEV SCHOOL"
-
Enter "MY DEV" in the second search field
-
Select a group (eg. "All students in group")
-
Choose "Application roles" menu
-
Enter "Message" in left search field and select the application called * "Messagerie_"
|
Tip
|
Grant access to all school groups to ease further testing operations. |
4. Activate user
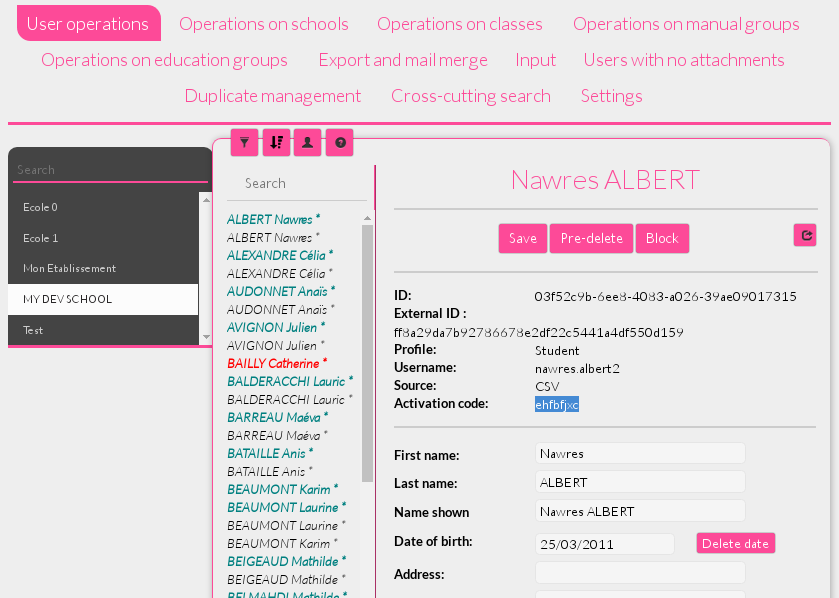
As user accounts are batch imported, each user receives an activation code. When he first logs in, the user has to choose a secret password.
-
Choose "User operations" menu
-
Select the school called * "MY DEV SCHOOL"
-
Select a user
-
Copy his Activation Code and remember his login
-
Log out from Admin console
-
Go to http://localhost:8090, to activate your user
|
Note
|
User color depends of his profile. Red for Teacher ; Green for Staff ; Yellow for Parent ; Blue for Guest ; Black for Student |